AD User Synchronization
Resolve Actions Express enables the synchronization of users and groups from Active Directory (AD). This is helpful for organizations that do not wish to manage separate user accounts in Actions Express. They can utilize the AD User Synchronization or the Azure AD User Synchronization activities to sync specific users, organizational units (OUs), or groups from the company's AD accounts into Actions Express.
Two options are supported - Windows Server AD and Azure AD.
To use this functionality, your license must include the Active Directory or Azure activities.
By default, if a user or a group with the same name already exists in Actions Express (created manually), they will not be synchronized. If you want to update them, you need to enable the Update Existing option in the user synchronization procedures described below.
Synchronizing with Windows Server AD
Syncing AD users and groups into Actions Express using the AD User Synchronization activity turns them into Actions Express Recipients, which can then in turn be made into Login Users and Groups.
Setting Up Windows Server AD Synchronization
To create a workflow for synchronizing AD users into Actions Express, proceed as follows:
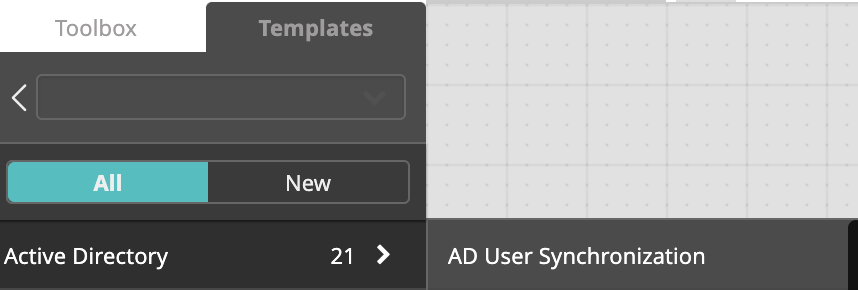
- In the Workflow Designer, create a new workflow using the AD User Synchronization template from the Active Directory templates category.
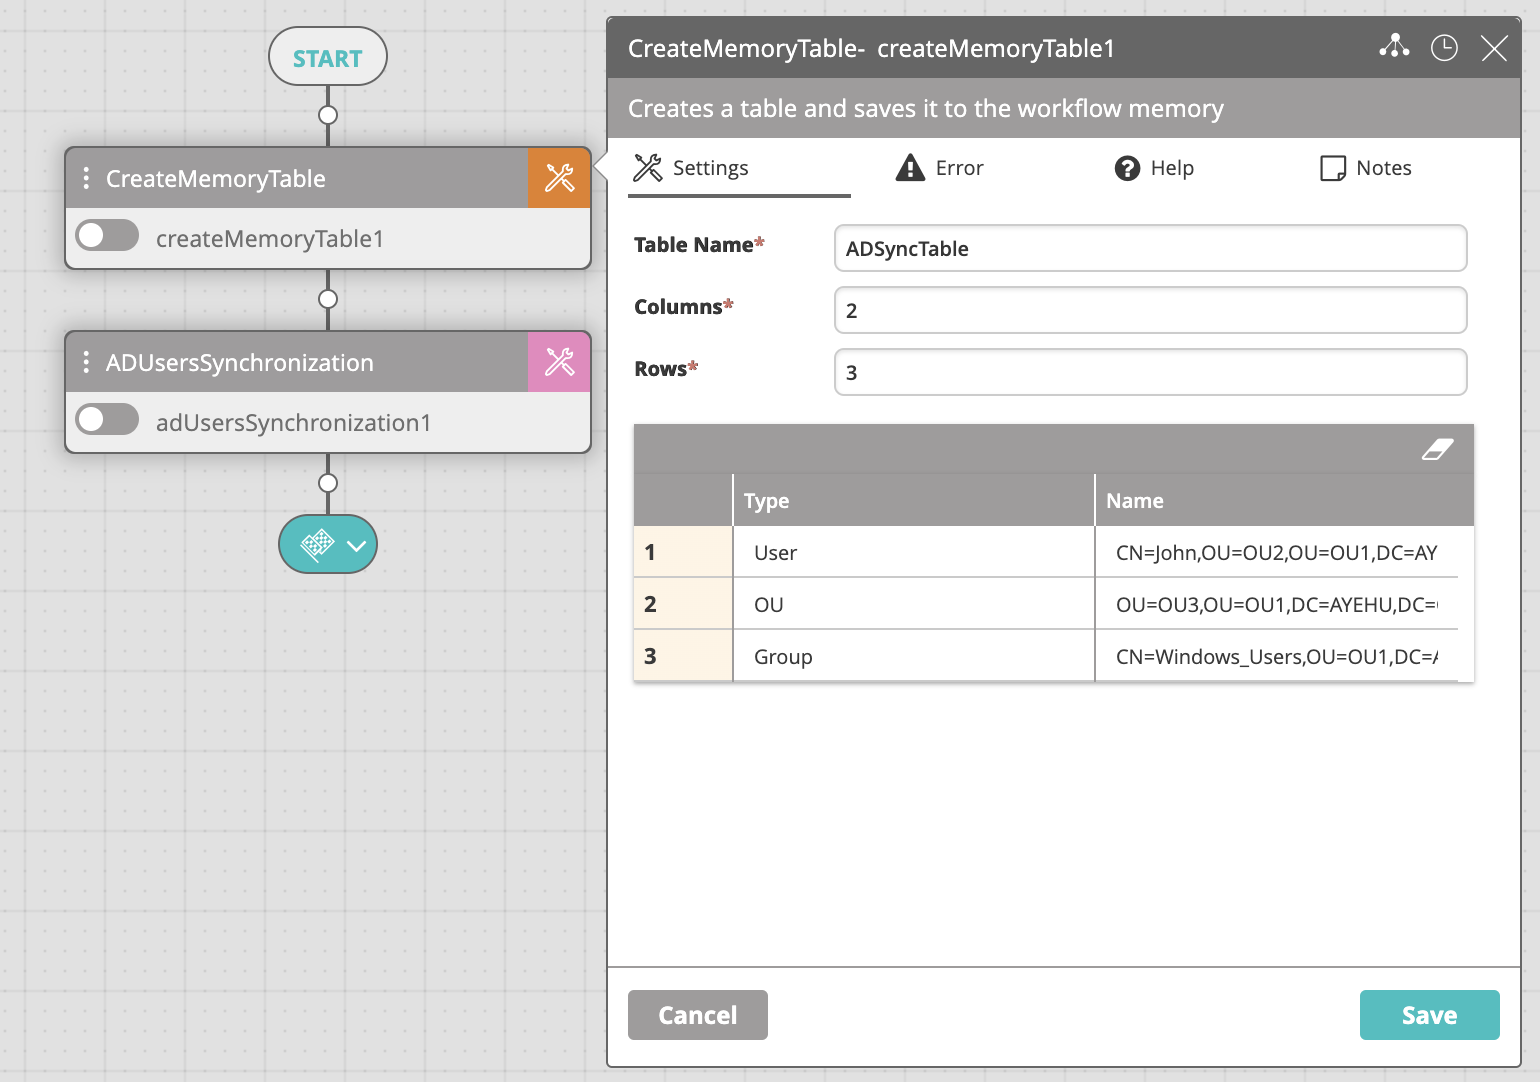
- The workflow will contain two activities: Create Memory Table and AD Users Synchronization.
- Edit the table in the Create Memory Table activity while maintaining the following guidelines:
- The table must contain only two columns: Type, Name.
- The Type column may be set with one of the following values: User, OU, Group.
- The Name column must be set with the DN (Distinguished Name) to the specified object.
- You may add as many rows to the table as you want.
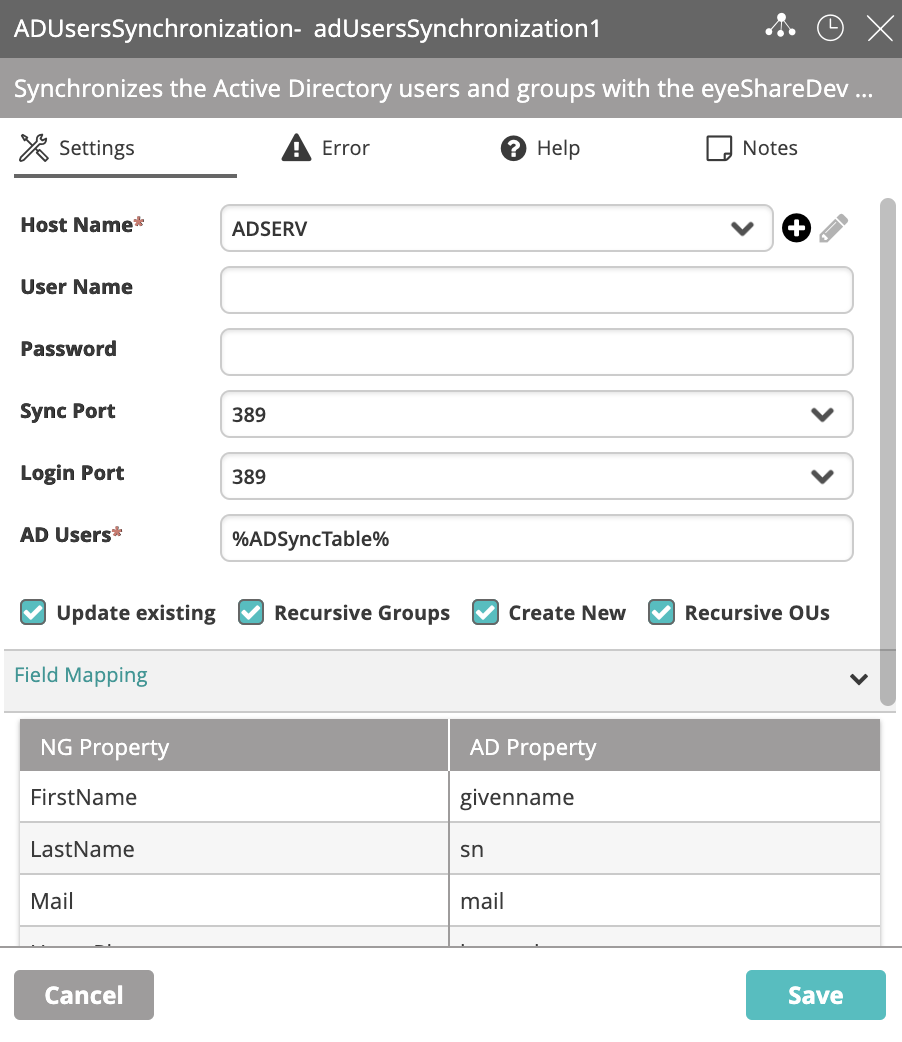
- Edit the AD Users Synchronization activity settings:
- Host Name: A domain controller device that is defined in Incident Configuration > Devices.
- Sync Port: Port used to sync users.
- Login Port: Port used for these users to later log in to Actions Express. For security reasons, some companies require different ports.
- AD Users: The list of AD users/groups to synchronize. This can be static (the object ID for a single user and/or group) or a reference to a memory table created for this purpose.
If we use the above example, the value of this field will be the Table Name field of the Create Memory Table activity:%ADSyncTable%. - Update Existing: By default, if a user or a group already exists (has been created manually before synchronization), they will not be updated. When this is checked, existing users are updated.
- Recursive Groups: When a group is synchronized, you may decide whether to synchronize the data recursively or not. When synchronizing the data recursively, subgroups and user data are also synchronized.
In Actions Express, subgroups appear at the same level as their parent groups. - Create New: If checked, Actions Express will create new users and groups at every next run of the activity after the initial one.
- Recursive OUs: If checked, Actions Express will create or update the OUs recursively.
- Field Mapping: Map Actions Express properties to relevant AD properties. Must be checked when syncing users and groups.
- Run the AD User Synchronization workflow.
When the process is completed, you will be able to see all imported AD groups in the Actions Express Main Menu > Repository > Recipients > Groups (containing their users' objects) and all imported AD users in the Actions Express Main Menu > Repository > Recipients > Users. Subgroups also appear as their own row in the Groups table to allow for more granular management.
Users and groups synced from AD are in read-only mode, and their information and/or membership cannot be changed in Actions Express. Any changes must be made in AD and then synced into Actions Express in order to be reflected in the user or group.
To ensure that the data in Actions Express most closely reflects the data in your AD, we recommend that the AD User Synchronization workflow be run at a regular interval (hourly, daily, or weekly, depending on your requirements).
Creating Logins from Recipients
Once AD users have been synced to the Recipients section in Actions Express, desired users/groups can be designated as Logins and be allowed to log in to Actions Express with a specific role.
See how to create recipient users and groups.
Only AD Security Groups can be synced to make Login Groups in Actions Express. AD Distribution Groups are not supported in this manner.
When syncing a Security Group, you don't need to re-run the synchronization workflow each time a new user is added to that group. Any new AD users added to the already synced Security Group can log in to Actions Express and their account will be automatically created.
For security purposes, once a manually created group becomes a login group, it can only be managed in the Logins page and not the Recipients page.
Domain Mapping
Mapping domains is a critical part of the user synchronization and login process. You must map a domain – entering valid domain and device – for users who belong in that domain to be able to log in to Actions Express.
Domains Table
The Domains table is located in the Logins page. It is populated with domains that are synced using the AD User Synchronization activity, displayed in the table with their Domain Name and Port.
Editing Domains
To edit domains, you need the Administrator role.
To edit a domain, click its row and expand the configuration panel on the right. Note that you can change the domain's port from the drop-down list of available ports, but not the domain itself.
When users and groups from multiple domains are synced into Actions Express, the unique domains are identified and imported into the database.
To add domains, re-run the AD User Synchronization activity with the newly added domains.
Synchronizing with Azure AD
Syncing Azure AD users and groups into Actions Express using the Azure AD User Synchronization activity turns them into Actions Express Recipients, which can then in turn be made into Login Users and Groups.
Setting Up Azure AD Synchronization
The Azure AD User Synchronization procedure consists of two segments - the configuration of an Azure AD client application and the syncing of Azure AD Users and Groups into Actions Express.
Setting Up Client Application and Client ID in Azure AD
Before you start using the Azure AD synchronization functionality, you need to register a client application and an application (client) ID in Azure AD. To do that, proceed as follows:
- In the Azure portal, select Azure Active Directory.
- In the panel on the left, select App registrations.
- Select New registration.
- In the Name field, give the application an indicative name.
- For Supported account types, select Accounts in any organizational directory (Any Azure AD directory – Multitenant).
- Click Register.
- In the panel on the left, click Authentication.
- Under Advanced settings > Treat application as public client, select Yes.
- In the panel on the left, click API permissions.
- Click Add a permission.
- Select Microsoft Graph.
- Select Delegated permissions.note
Currently, Application permissions are not supported.
- Add required permissions to the app (minimum requirements):
- Directory.Read.All
- Group.Read.All
- GroupMember.Read.All
- User.Read
- User.Read.All
- Click Add permissions.
- Click Grant admin consent.
The Application (client) ID will now be visible from the Overview tab in the left-hand panel. Use this ID in the Azure AD Users Synchronization activity when syncing users and groups.
Syncing Azure AD Users and Groups into Actions Express
Note that, by default, if a user or a group with the same name already exists in Actions Express (created manually), they will not be synchronized. If you want to update them, you need to enable the Update Existing option in the Azure AD User Synchronization procedure described below.
Syncing Azure AD users and groups into Actions Express using the Azure AD User Synchronization activity turns them into Actions Express Recipients, which can then in turn be made into Login Users and Groups.
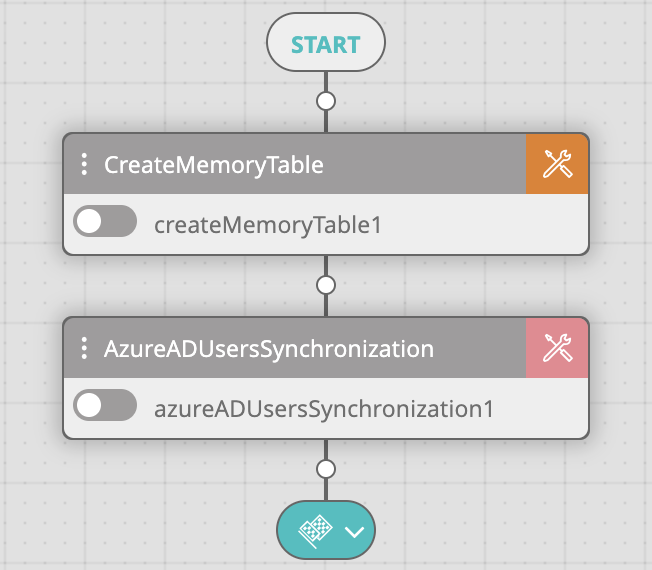
To create a workflow for syncing AD users into Actions Express, proceed as follows:
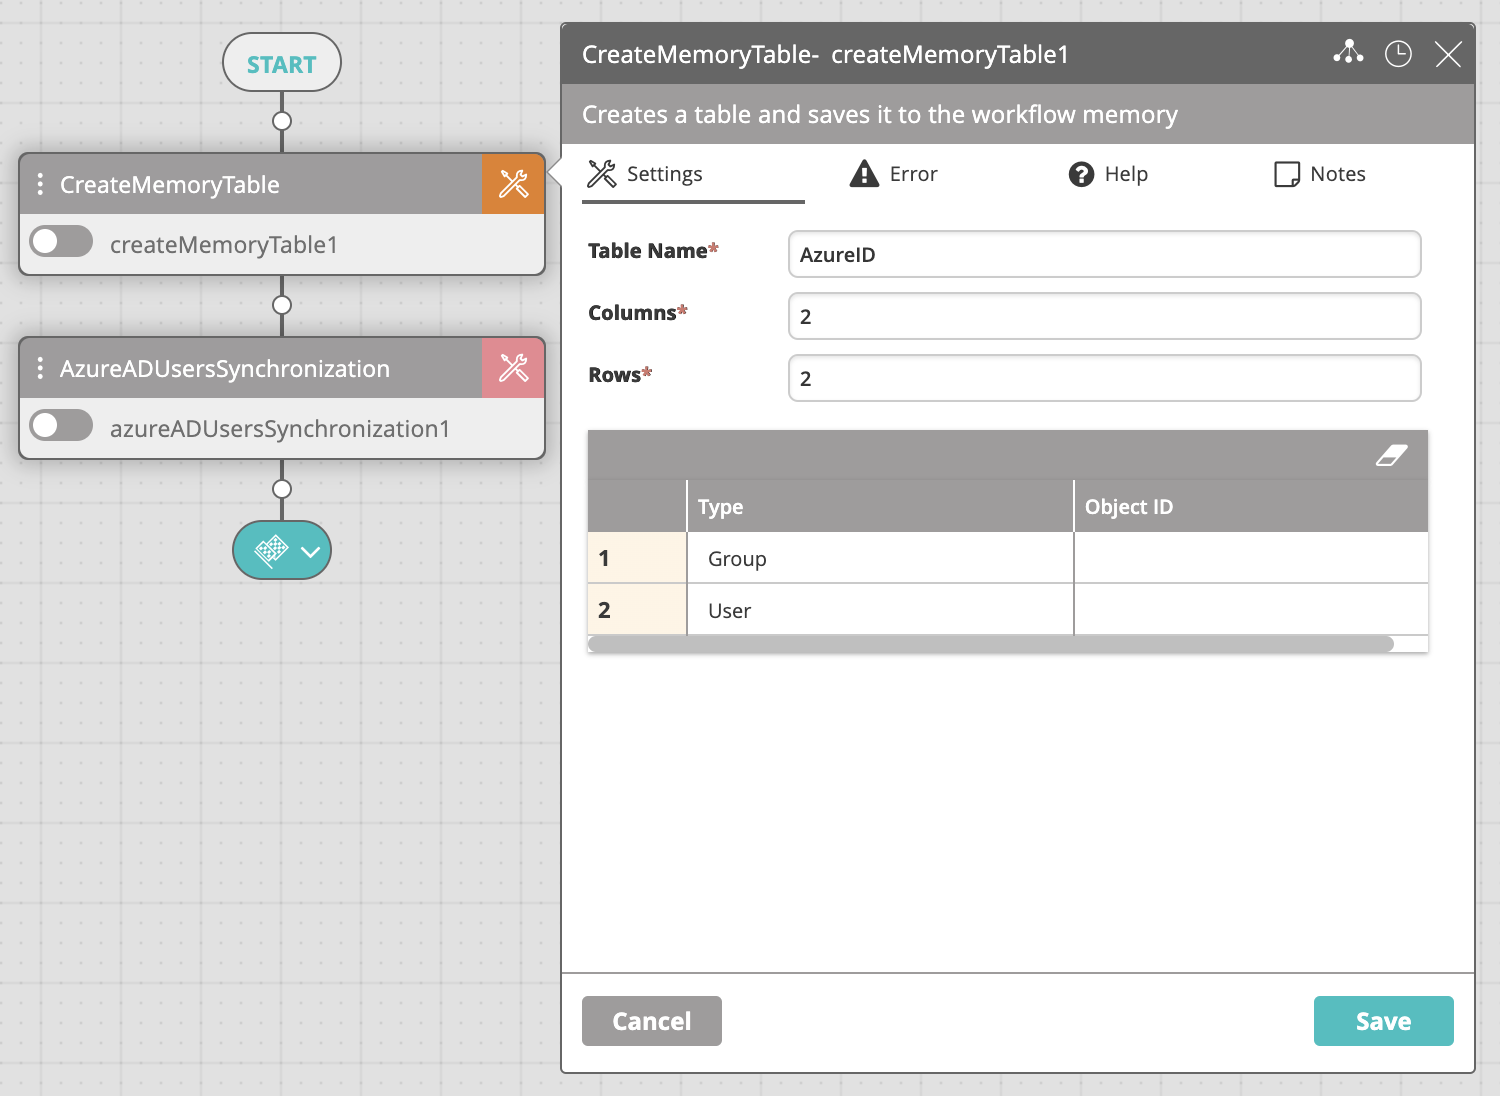
- In the Workflow Designer, create a new workflow with the following activities:
- Edit the table in the Create Memory Table activity while maintaining the following guidelines:
- The table must contain only two columns: Type, Object ID.
- Add a row for each group that you want to sync, setting Type to Group and Object ID to the ID of the specified object.
- Add a row for each user that you want to sync, setting Type to User and Object ID to the ID of the specified object.
- You may add as many rows to the table as you want.
- Edit the Azure AD Users Synchronization activity settings:
- Tenant ID: Tenant ID in Azure AD.
- App Client ID: The Application (client) ID associated with the Azure App Registration.
- Client Secret: Secret string generated within the Azure App Registration for requesting a token.
- AD Users: The list of AD users/groups to synchronize. This can be static (the object ID for a single user and/or group) or a reference to a memory table created for this purpose.
If we use the above example, the value of this field will be the Table Name field of the Create Memory Table activity:%AzureID%. - Update Existing: By default, if a user or a group already exists (has been created manually before synchronization), they will not be updated. When this is checked, existing users are updated.
- Recursive Groups: When a group is synchronized, you may decide whether to synchronize the data recursively or not. When synchronizing the data recursively, subgroups and user data are also synchronized.
In Actions Express, subgroups appear at the same level as their parent groups.
- Run the workflow.
To sync multiple Azure tenants, use either of these approaches:
- Create a separate workflow for each of the tenants.
- Within the same workflow, add and configure a separate Azure AD Users Synchronization activity for each tenant.
When the process is completed, you will be able to see all imported Azure AD groups in the Actions Express Main Menu > Repository > Recipients > Groups (containing their users' objects) and all imported AD users in the Actions Express Main Menu > Repository > Recipients > Users. Subgroups also appear as their own row in the Groups table to allow for more granular management.
The Tenants and Domains associated with the imported Users and Groups will be visible in the Actions Express Main Menu > Logins > Azure Tenants grid.
Users and groups synced from Azure AD are in read-only mode, and their information and/or membership cannot be changed in Actions Express. Any changes must be made in Azure AD and then synced into Actions Express in order to be reflected in the user or group.
To ensure that the data in Actions Express most closely reflects the data in your AD, we recommend that the Azure AD Users Synchronization workflow be run at a regular interval (hourly, daily, or weekly, depending on your requirements).
Creating Logins from Recipients
Once Azure AD users have been synced to the Recipients section in Actions Express, desired users/groups can be designated as Logins and be allowed to log in to Actions Express with a specific role.
See how to create recipient users and groups.
Only Azure AD Security Groups can be synced to make Login Groups in Actions Express. Azure AD Distribution Groups are not supported in this manner.
When syncing a Security Group, you don't need to re-run the synchronization workflow each time a new user is added to that group. Any new Azure AD users added to the already synced Security Group can log in to Actions Express and their account will be automatically created.
For security purposes, once a manually created group becomes a login group, it can only be managed in the Logins page and not the Recipients page.
Viewing Synced Azure Tenants
You can sync multiple Azure tenants to your Actions Express deployment and view them in the Azure Tenants table located in the Logins page. It is populated with tenants that are synced using the Azure AD Users Synchronization activity, displayed with their Tenant Name, Domain Name, and App Client ID.
From here, you can only delete Azure tenants but not modify them or add new ones.
To add tenants, re-run the Azure AD User Synchronization activity with the newly added ones.